Friday, September 13, 2013

Foodie Friday: Chicken Bacon Artichoke Pizza

The other night when I was making pizzas at home, we had everything we needed for our own Chicken Bacon Artichoke Pizza. Here are the results:

I decided to try out the Pioneer Woman's pizza crust recipe this time, rather than my old faithful. I really enjoyed the results. It was a more fluffy crust. It does take an hour or two to rise, which worked out this time. I think I will keep and use both. I will use PW's crust for days I can start the pizza early, and my old faithful for days I need to expedite the process.

As you can see, the pizza did end up quite tall. I think if I were to make it again, I would roll the dough a little thinner and try to chop the ingredients a bit more.
The white sauce recipe I used was pretty good. I wouldn't have minded a bit more garlic, but Mr. Cherry liked it as he isn't a huge strong flavor person. You can find the recipe I used here or feel free to use store bought.


Chicken Bacon Artichoke Pizza

Ingredients:
  • pizza dough
  • white sauce
  • diced, cooked chicken
  • diced artichoke hearts
  • bacon, cooked and crumbled
  • diced green onions
  • shredded mozzarella cheese
  • shredded cheddar cheese
Directions:
  1. Prepare crust according to recipe or directions and place on pizza stone or pan. (Make sure to use corn meal on stones and cooking spray on metal pans.)
  2. Spread crust with white sauce.
  3. Add toppings.
  4. Top with cheese.
  5. Bake pizza at 500 for 10 to 12 minutes until crust appears golden and cheese is fully melted and delicious!

Tuesday, September 10, 2013

Pajamas and Pillowcase Birthday Present


Remember that darling girl that Cream got to share her birthday with? Miss W is is as cute as can be and a sweetheart to boot. We wanted to give her a super great birthday present. And you know me, I can't just get a gift at the store. I have to add a little something homemade. Its just my style. So, I nabbed some pajamas off of her wishlist and then made a little travel sized pillowcase to go along with them. (Cream loves her little travel sized pillow, so I know it is just the right sized for little heads.) I did my typical french seam pillowcase and got the measurements from the blog As Reasonable as Can Be. I bought my travel pillow from Target. (They happened to be on sale the day I bought it!) I have also purchased them at Walgreens in the past.
There you have it! A duper fun birthday gift for anyone, really!

Friday, September 6, 2013

Foodie Friday: M & M Bark


This is as yummy as it looks! (Actually it is yummier, because I didn't take the pictures as soon as I made it and it is starting to bloom in these. But trust me, it is yummy!) I found this recipe on a blog I recently stumbled across called All Things Katie Marie. She is as cute as a button, has adorable style, and must have a ton of energy judging by all she blogs about. You can find the recipe for M & M Bark here. The only changes I made was that I used broken mini pretzels instead of sticks. I also somewhat doubled the ingredients to make a 9 by 13 inch pan. (I was bringing it to a gathering and wanted to make sure we had some at home. Smart, no?)
Now get thee to Katie's blog and make some of this salty, sweet goodness. Also, don't forget to enter the Origami Owl giveaway I have going right now!

Wednesday, September 4, 2013

Birthday Crowns

Little Miss W was in love with her crown! She is such a sweet little girl!

Like I said yesterday, I had been wanting to make fabric crowns for a while and Cream's birthday was the perfect excuse. I started looking around the internet and found some tutorials to base one off of.
These were some of my favorites that had the look I was going for:
How to Make a Superhero Headband from Curly Pops
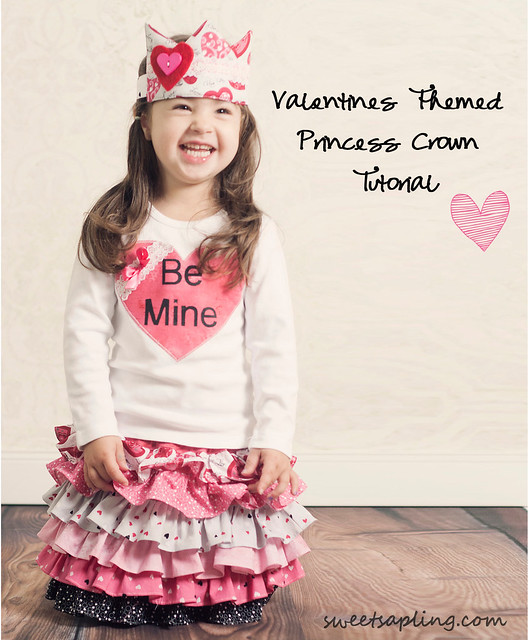
Valentines Themed Princess Crown from Sweet Sapling
Fabric Crown from The Little Giggler
Here is the best shot I got of both girls with their crowns.

In the end, I pretty much used the tutorial from The Little Giggler. I did add some felt embellishments, just a pinked circle and a #1 and #2. I ended up using an elastic headband I had around for the elastic in the back. It worked out well since it was a little wider and had some non-stick stripes on the back.
We even had Cream where hers on her actual birthday when we went out with some friends for a birthday dinner.


Wednesday, August 28, 2013

The Play Area

 And here is the grand reveal of the play area! (Sorry for the dark pictures, it is in the lower level and there are no windows.) This has always been a bit of a catch-all area. It helped when we got the EXPEDIT shelf from IKEA, but I still just needed to organize and purge to make it work. (You can see some of my inspiration here.)

 Now, it is a happy area, that the girls enjoy playing in and I enjoy looking at. This is saying a lot. Check out this awful before picture! (Now you know that I am perfectly honest with you in my blogging. I am airing our dirty laundry house with you all. Consider yourself loved!)
Ahh, that's better! I think it is partly due to organization, but also due to the fact that I finally cleaned it and you better believe I am keeping on the girls to keep it that way!!
(Do you see the photo bombers up above??) I mostly used items that we had already. I did buy the MAMMUT stools at IKEA. The rug under the table is from Walmart. I purchased the easel at a second hand store earlier this summer. And we have had the table downstairs since Peachy was little. It is actually an end table similar to the one in this bundle also from Walmart.

The cork boards are made from spray painted frames to which I added cork panels. (I have had good luck finding frames on clearance at Hobby Lobby and Michaels. You just have to imagine how good they will look with some spray paint.) The chalk board frame is made with chalk board paint. You can read about it here.
As long as I was doing work in the lower level, I added a collage above where I do my ironing. The print is from this great Etsy seller whom I had the privilege of meeting a sale we did together. Again the frame is a spray painted one that I added some extra color to. The other frames I picked up at Kohls at the beginning of the summer. (It looks like the exact frames I got are no longer available, but there are some other ones here.)
I also finally got some pictures of Cream up in their bedroom and her name on the wall. I guess you have to be a member of the family for two years before you get those honors.
Hope you like what I have done. What plans do you have to beautify an area in your home?


Friday, August 23, 2013

Foodie Friday: Power Muffins


It is no secret I love me some carbs, especially at breakfast. I blame the fact that I am a coffee drinker. Nothing goes better with coffee than a delicious baked good. However, I do try to be a little bit healthy with my choices. Some days it is whole wheat toast with peanut butter. Some days it is whole grain waffles and fruit. When I saw this recipe for Power Muffins at Domesticated Academic I figured it would also be a good healthy breakfast choice.
Yesterday morning I was planning on working out and then mixing these up before anyone in the house was up. Yeah, I got halfway through yoga and Peachy came up and was just finishing when I heard Cream. Not so much on getting the muffins done before everyone got up. After feeding the girls a yogurt, I got to work. It was hard for Cream to wait for me to make and bake the muffins.
If possible, she is more of a carb addict than her mother. We actually call her a carbavore. However, I do believe they were worth the wait. They have a light texture and are stuffed with yummy goodness. They also go well with coffee or milk!

Tuesday, August 13, 2013

Play Area Inspiration

One of the main areas I am focusing on in my organizational binge is the downstairs play area. Last year we made some changes down there. The main one being adding  an IKEA Expedit shelving system. And while that definitely helped in getting all of the toys corralled and put away, it still needs some work to make it functional and welcoming.
I put together my own little inspiration board for the space. Included are these ideas: (Please click the link to get the ideas from their original sources.)
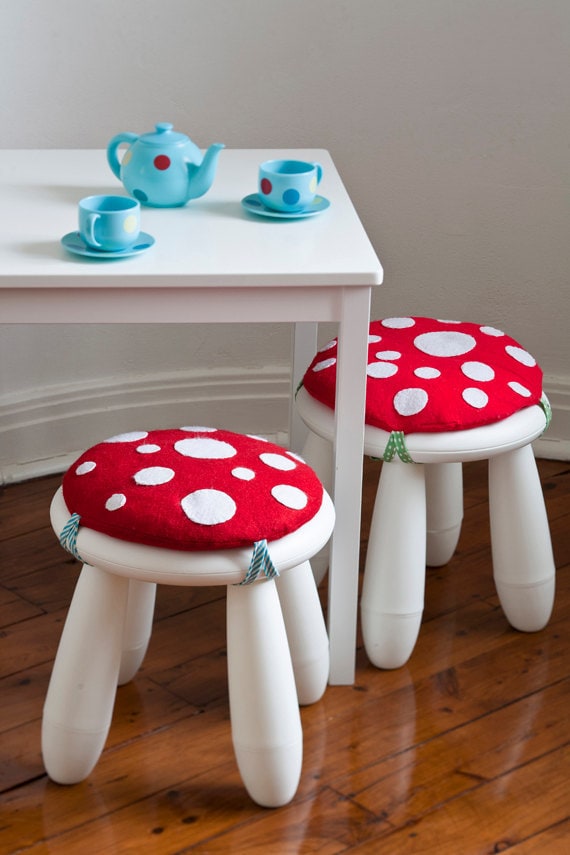
I am loving these Mammut stolls turned mushrooms.

These play pillows are graphic and just plain fun!

The simple addition of paper pennants to a table add such a great splash of color.

And adding to the pennant idea, these gorgeous photo pennants.