And so I began scouring Pinterest and Google Images for art party ideas. There are plenty of great ideas out there. You can check out my Arty Party board on Pinterest for many of the ideas I found.
I started with the invitation. The inspiration for the invitation is from P is for Party and the party they featured from Magnolia Creative. I made mine using my Silhouette SD. (I have yet to blog about my new toy, but I love it and will share more at a later date.)
I also made this banner with my Silhouette. I used paper from Amy Locurto's PB Party line called Over the Rainbow.
I tried to use items I had around the house in decorating. The felt garland along with the small rainbow pennant garlands were made for my craft fair in February. I also use the rainbow IKEA TOLSBY frames in my craft booth.
The large picture frames I painted a while back and am intending to eventually use them as kids' art displays in our downstairs. I made the paper pinwheels using my Silhouette.
I had made the girls rainbow shirts for St. Patrick's day. I also had the rainbow crepe paper from a St. Patrick's Day project.
My friends all know my cake balls well. I use Bakerella's method with a crumbled sheet cake mixed in with a tub of frosting and dipped in almond bark. Then I sprinkled them with a rainbow of jimmys and colored sugar. I cut out a large palette shape to display them on, using my, you guessed it, Silhouette.
I had intended to have the art portion of the party in our backyard, but the weather was super windy and chilly, so Mr. Cherry and my dad cleaned out the garage for our art studio.
I made a rainbow of playdough using a basic playdough recipe and adding in lots of food coloring. (My hands were a lovely explosion of colors for a few days.)
I also had purchased paint daubers from Michaels and used them with printed activity sheets. (Just do a search and you will find plenty.)
I had wanted to spray a huge sheet of fabric with colored water (water and food coloring in spray bottles) but once we made the decision to use the garage I cut individual sheets of muslin for the kids to use and spray their own.
My master plan was to use the painted fabric as a photo booth backdrop with some of the painted frames, but that just didn't happen. We may have to have a future playdate with that as an activity because I was really looking forward to it!
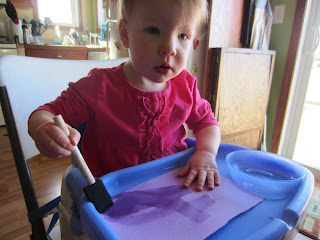
Here are some of the artists at work in the studio.
The great thing about the activities is that they were suitable for all of the ages we had at the party and they didn't require a lot of supervision or supplies.
The final activity was making a necklace using fruit loops and a ribbon. The necklaces and the treat were enjoyed by all.
For favor bags I used some muslin bags that I had purchased from this website and then had Peachy color pictures on them with fabric markers.
We made some homemade watercolor paints using this recipe and placed in these cups from Amazon. (Don't mind the fact that they are actually intended for Jello shots!)
We also had aprons for all of the guests that I also ordered from Amazon. I made stickers using my Silhouette once again with each of the guests names on to place on the aprons. (Since I needed 13 aprons and they came by the dozen, I made a special one for the birthday girl. I found my rainbow fabric at Wal-Mart and used the leftover for decorating the tables.)
For the babies of the group, I made little stuffed sensory clouds with this as my inspiration.
Here is a simple crayon wreath that I hung on the door. I made a wreath form from some cardboard and hot glued the crayons to it. I added a painted 4 and one of the paper buntings. I loved how it all looked on our red front door!
I kept the food pretty simple and just went with fruits and veggies. In order to fit it into the theme, I put them all in their own bowls and arranged them in rainbow order on the table. I also made little creative juice labels for the juice boxes.


